

Tips for TitlePlate's Ordering Interface
This application was intended to work with all types of devices. It does seem easiest to use on desktop computers with all of the major desktop browsers. Still, go ahead and try it out with your tablets, ipads, and mobile Apple and Android devices too. As a rule of thumb: the smaller the device, the more demanding the order experience will be on your eyes and fingers.
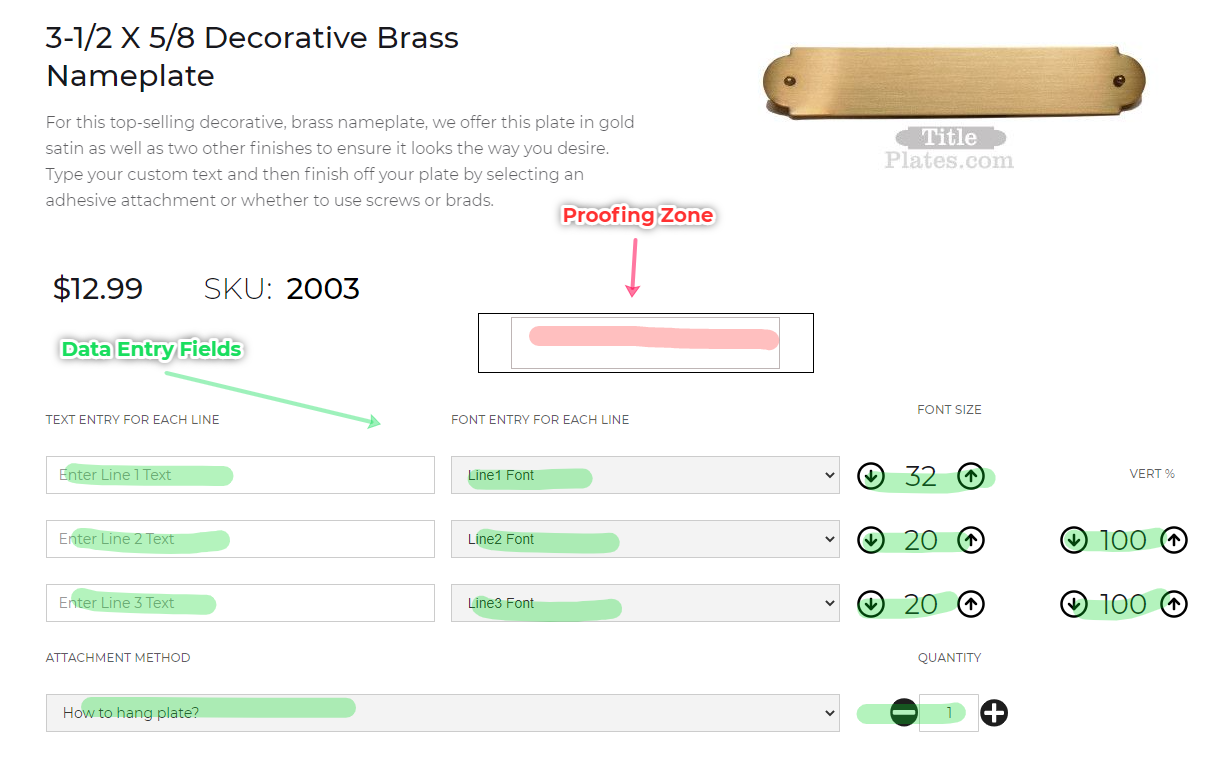
On our order page, you enter the text for each plate, choose the font, set the font size, and if there are multiple lines of text you can set the line spacing. Finally, you can choose the mounting requirements for the plate. That is what you do when ordering. Now let’s go deeper to understand what is automatic, what you can manage, and how you manage it.
Our nameplate app renders your inputs in the proofing-zone. The proofing-zone shows a fixed outline for the plate being ordered – the profile. The rendered size is a neat approximation of the actual size of the finished plate. So take a look at the profile and you should be able to judge if this is the size you’re really expecting. If the plate is looking a little small and you’d like to zoom in to see how it looks, simply hold your mouse over the proofing-zone and it will automatically zoom to2x its original size. This is really helpful if you want to ensure your letters are correctly spaced and positioned. When your device is smaller than the optimal size of the ordering page, as you scroll, the proofing-zone will remain anchored to the top of the viewing window.
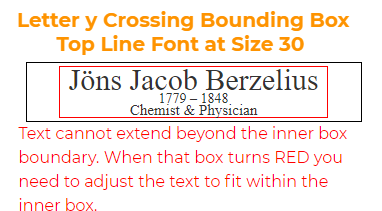
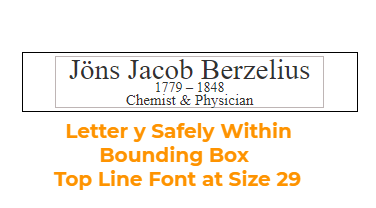
Inside the profile is the inner text boundary-box. This box represents the maximum area available for the text to be rendered – and eventually engraved on the selected plate. The boundary box avoids places where holes might be. It also ensures there is sufficient buffer between the text and the edge of the plate. When your text renders neatly within the boundary-box the box color remains black. As soon as your rendered text oversteps the boundary-box, the boundary-box changes color to red! A red boundary-box causes an alert message to appear and will not allow you to add the plate to your shopping cart until the boundary-box is returned to its’ normal color.
There are places for three lines of text to be entered in the editor. The text in the data-entry field is unformatted. It will be formatted in the plate-zone only when there is text in the text field and the font has been chosen. When the font drop-down says “Line1 Font” that means there has been no font chosen. When no font is chosen, the affiliated text on the same line will not be rendered in the proofing-zone nor will it be engraved on your plate!
[note: Each text line is by default centered horizontally on the plate. The 3 lines of text are by default, centered vertically on the plate.]
Once the text line renders, you may increase or decrease the size of the font for that line of text. Clicking the up arrow increases the font size one unit. Clicking the down arrow decreases the font size. There is a nifty trick for adjusting font sizes. The font size numbers are in a number-entry-field so you can also click in the number entry field and type the font size you want. Even better – if you click in the number field – you can use the up and down arrow keys on your keyboard (remember, this feature works better on the desktop) and each key-up or key-down will adjust the font size. Very handy!
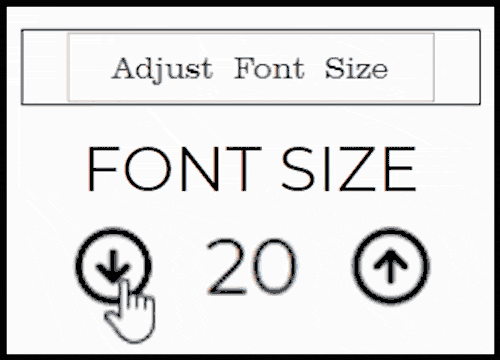
[note: font size minimum is 10 and maximum is 60 with increments of 1 unit]
The line spacing entry fields work the same way as the font-sizing entry fields. Up to increase the spacing and down to decrease the spacing.

[note: line spacing minimum is zero and maximum is 200 with increments of 10 units]